There is not a single mom in the whole wide world that isn’t dealing with stains on a daily. We find them everywhere – on our kids’ clothes, on our clothes, on our furniture, on our carpets, on our walls… Using harsh chemicals around the house is not a good idea when you have little kids and pets around. That’s why I wanted to share with you my secret recipe for the best DIY stain remover ever! It’s been saving my clothes (and sanity) for quite some time now. Every mom needs to know how to quickly and easily make her own stain remover that really works!
Pros Of DIY Stain Remover
-
Get Rid Of Stains At A Price You Just Can’t Beat
I have been using this DIY stain remover for a few years, and I have to say it is my go-to stain remover. This DIY stain remover really tackles all of the stains in my home.
I love having a stain remover I can make for an affordable price. And to be able to use it on stains with different origins. This DIY stain remover has been through many stains, and hasn’t let me down yet! Not even once! This is exactly the reason I decided to tell everyone how to make it.
-
No Dirt Is A Challenge Anymore With This DIY Stain Remover
It can tackle classic food stains, set-in grease, blood, car oil, yellow armpit stains, and more. It is a simple mix of ingredients that you most probably already have on hand.
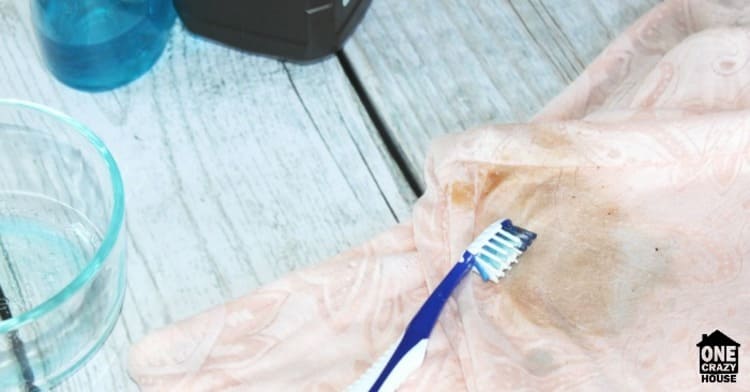
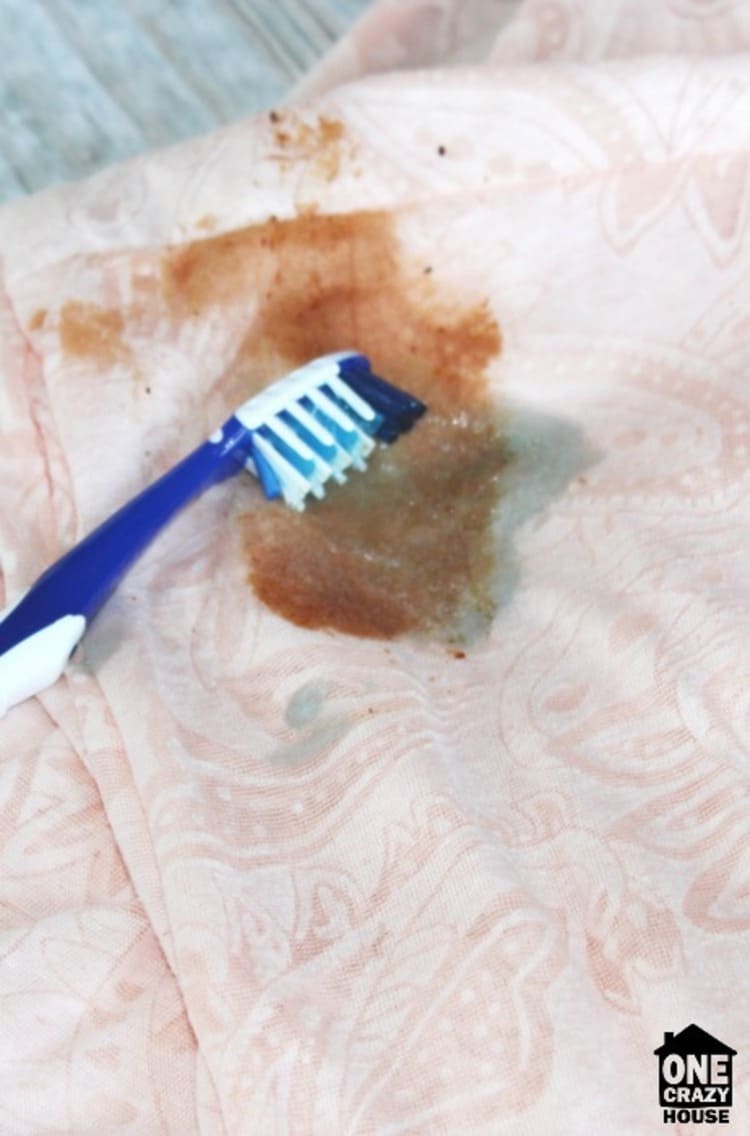
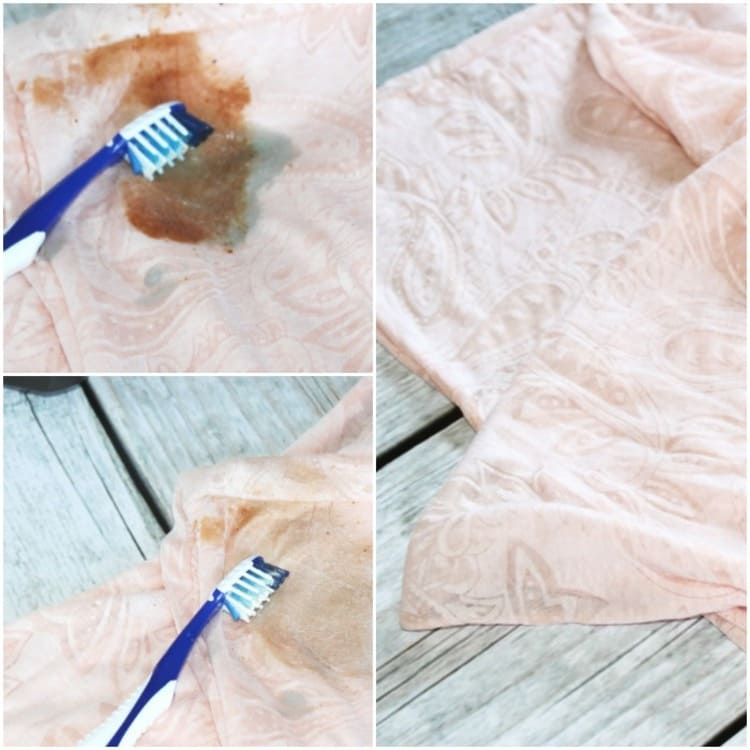
If I have a really stuck-on stain, I grab a bristle brush or even an old toothbrush to help work it in the garment and really help break down that yucky smudge. Put a good amount of the DIY stain remover and cover the whole dirty area. Then, put the brush to work. Scrub well but be careful not to harm your clothes (some textiles are easily damaged).
However, the sooner you treat a nasty stain, the better. I had a barbecue sauce stain, that luckily hadn’t fully set in. I was able to use this homemade stain remover on it before it fully dried. It worked like a charm, and you can’t even tell a stain ever existed. This is my go-to stain remover and it is so affordable.
-
A Cleaning Solution For Sensitive Noses
If you have any type of breathing issues or you’re just sensitive to strong and unpleasant smells, you already know that not all of the products on the market would work for you.
But a DIY stain remover that you’ve made by yourself with ingredients you’re already familiar with could solve your problem once and for all.
-
DIY Stain Remover Is Way More Kid And Pet Safe Than The Commercial Brands
Keeping your kids and your pets safe is every mom’s priority. And this is not an easy task with all the chemical ingredients we’re not really familiar with.
Every time I look at a store-bought cleaner’s bottle, I have no idea what it has in it. Those long and hard to pronounce ingredient names have absolutely no meaning for me (except probably a few more common ones). With the constant news we hear about products that get pulled from the market because of harmful compounds, I am very conscious and careful with what I buy.
But if you make a DIY stain remover by yourself, you can make it from solutions that are actually safe to use by anyone.
-
They Really Do Their Cleaning Well
And that’s a fact! You can easily make your own DIY stain remover and test it for yourself. You’ll be surprised by how effective such a simple recipe could be!
Sometimes the first go-around won’t fully remove the stain (if it is dried out or pretty severe). I then simply repeat the process, and it comes out by the second wash.
I do recommend to spot test on garments, to ensure it will not hurt the fabric. Spot test a standard thing I do when I use this or any other DIY stain cleaner for clothes, carpets, and more. If you’re dealing with more delicate fabrics, you might want to test the commercial cleaners before use, too.
As an added bonus, here are 19 other ways to remove stains on items in your home.
Cons Of DIY Stain Remover
-
May Not Work On Years Long Stains
If you have a gross stain on your blouse since last autumn, you might not be lucky enough to get rid of the stain. You can try leaving it for a few hours and then throwing the clothes in the laundry to wash it but I can’t promise you’ll get rid of it easily.
-
DIY Stain Remover Can Cause Damage To Some Fabrics
ALWAYS test your DIY stain remover before applying it to bigger surfaces! Find a small hidden place (inner corner or any other place that you don’t normally see and you won’t care if it gets damaged) to test your product.
Apply a few drops of your DIY stain remover and leave for a few hours. Then, wash it clean and supervise the tested surface. If there’s no damage, you’re good to go!
-
Could Cause Skin Irritations With Wrong Proportions
DIY recipes could easily be made with the wrong proportions. This might lead to skin irritations (especially if you have small wounds or very dry skin). So always use with caution and don’t forget to wear gloves with use. Gloves are the best way to keep your hands safe.
The Best DIY Stain Remover That Truly Cleans It All
Prepare to be surprised at how easy it is to make your own stain remover. Here are the instructions:
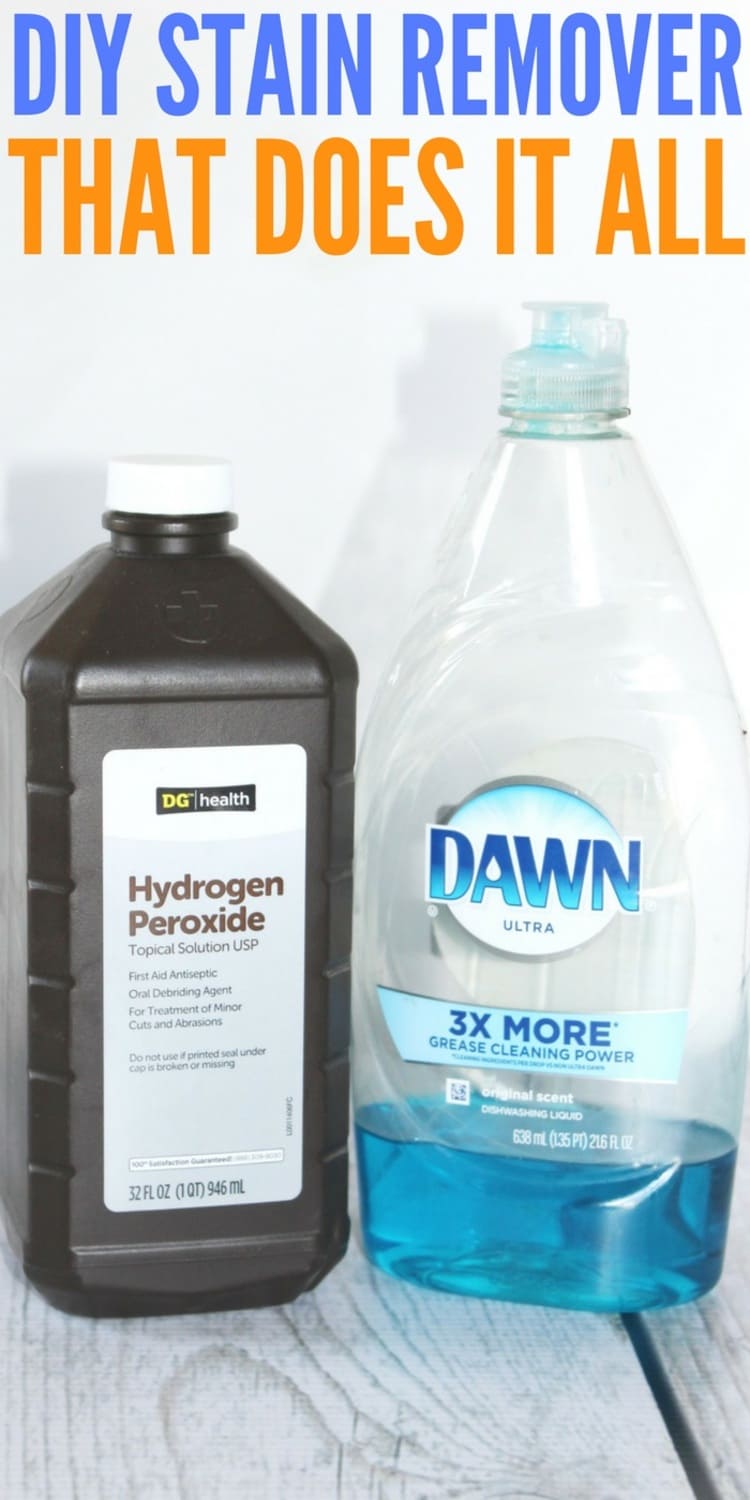
What You Need:
- 2 Parts Hydrogen Peroxide 3%
- 1 Part Blue Dawn Dish Soap (Has to be the classic blue)
- Bowl
- Spoon
How To Make It:
- Pour the hydrogen peroxide and the dish soap together in a bowl.
- Mix well, until the ingredients are fully combined.
Once they are, your DIY stain remover is ready for action!
How To Use Your DIY Stain Remover
- Pour a generous amount of the stain remover onto the stain.
- Take a stiff bristle brush or toothbrush and work the stain remover into the stained area on the garment. Be generous and scrub well.

- Let it sit for about an hour and a half. If it is a really harsh stain, leave it for even longer.
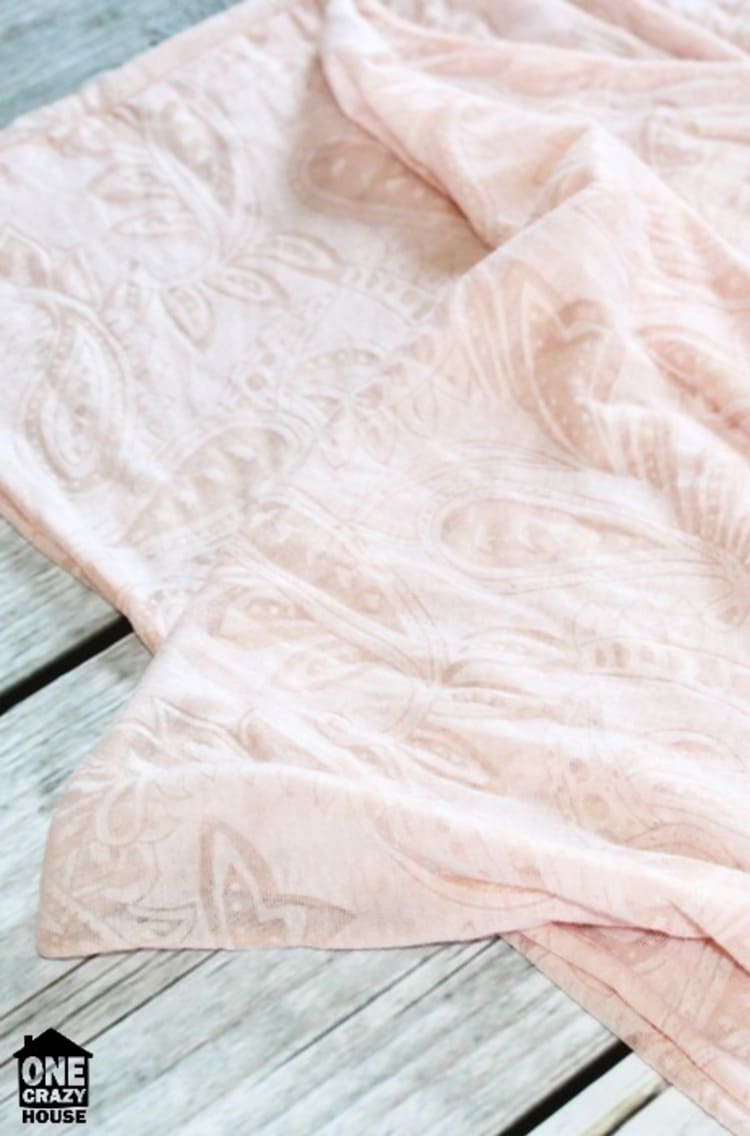
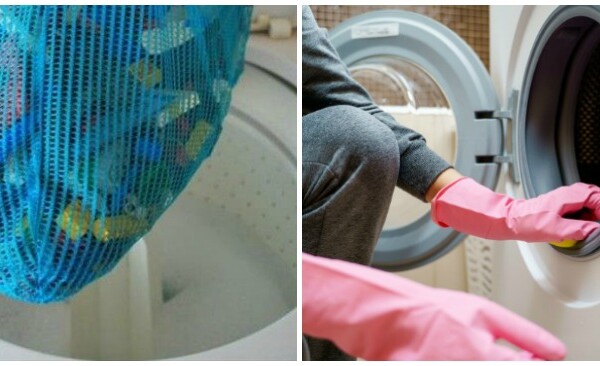
- Wash like normal, and then look it over to ensure the stain is gone.
- If the stain didn’t fully remove from the garment, repeat the process.
I usually treat the stains as soon as I can. If I didn’t have time (which happens every now and then), I treat the clothes with the DIY stain cleaner after I put the children to bed. Then, I schedule my washer to turn on in the middle of the night, so the solution could work its magic for several hours.
I get the laundry in the dryer first thing in the morning and usually, it’s ready to be put away in the closets afterward.
IMPORTANT NOTE!
Do not put treated clothes in the dryer if the stain is not removed, or it will make the stain set in the clothes. Double-check all of the stains you pre-treated because after they dry up, the chance of getting it out is very insignificant.
Any leftover stain remover can be stored in an airtight container. I generally make enough for the stain each time and try not to keep a lot of extra on hand, as it works best when it is freshly made.
It is a very powerful stain remover that is gentle on your clothes. That makes it a winner in my book! Plus, it is so affordable and easy to create.
I have even used this DIY stain cleaner on my carpet in our living room. It did a great job of pulling up the stain and didn’t harm our carpet. Just like with clothes, I do recommend testing an area on your carpet to ensure it doesn’t harm it. This is the go-to stain remover that I highly recommend trying.
In Conclusion
Such impressive results with a DIY stain remover that’s so easy to make! Isn’t that just great?
You can clean your leather bags, your suitcases, your belts, your clothes, even some of your shoes! You can’t deny simplicity does make life easier. So why complicate it with a thousand over-the-counter stain removers with unpleasant chemical smells?
Where are you going to try your DIY stain remover on first? (I am just making a batch to clean some marker from the sofa…) Tell me in the comments! I’d love to celebrate your victory over the nastiest dirt!
Did you like this DIY stain remover recipe? Then, you gotta check out these posts, too:
- How to Make Your Own Hand Sanitizer
- 15 Easy DIY Cleaners For Every Room In Your Home
- 15 Ultimate DIY Cleaners that Use Essential Oils
- Amazing DIY Natural Cleaners Using Essential Oils
- Unclog Garbage Disposal with DIY Garbage Disposable Cleaner


0