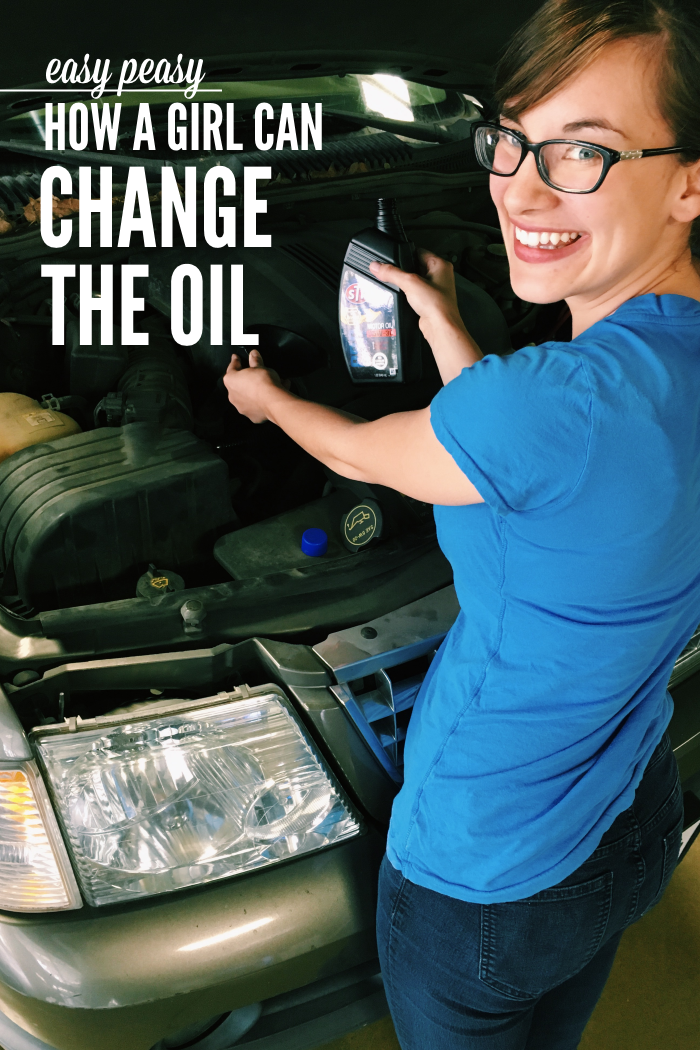
Changing oil is a man’s job. At least, that’s what the world wants us to think, right?
They act like it’s too messy, too complicated, too technical of a task for a woman to understand. But ladies, it’s time we change the stigma. Many thanks to AutoZone Hoods Up campaign for sending us a gift card (and they have one for you too – Read the details at the end!!). AutoZone is sponsoring this post.
Because not all of us have a man around to do that work for us and even if we do, he might not always be there. Maybe he’s a busy guy and you don’t want to be a nagging wife once that mileage flips past three thousand miles. Maybe HE doesn’t even know how to change the oil! Maybe you’re sick of paying top dollar for the cheaply done work at oil shops. Maybe you just want to exert a little female independence. Any or all of these reasons are good enough to learn how to change your own oil today. And we’re going to do it together. Step by step, no one gets left behind, no one needs to feel like this is going over their head.
So let’s do it sisters, lets change our OWN oil. Are ya with me? GIRL POWER.
First of all, let’s establish WHY it’s great to change your own oil. It’s not a huge price difference to just go and have somebody else change it for you, right? But those oil-changing shops are trying to turn a profit, and in order to do that, they’re using the lowest quality oil filters and cheapest oil possible (unless you request otherwise and pay the difference). And have you been to an oil shop lately? They always have a list of 13 other things they’ll pressure you into having done and then your bill goes from $19.99 to well over a $100, and you’re not even sure if you needed all of that. So if you want to ensure that the job is getting done right and with the best possible supplies, do it yourself! And over time, you will be saving money. Better oil means a better running car, and it means a car that needs fewer trips to the mechanic.
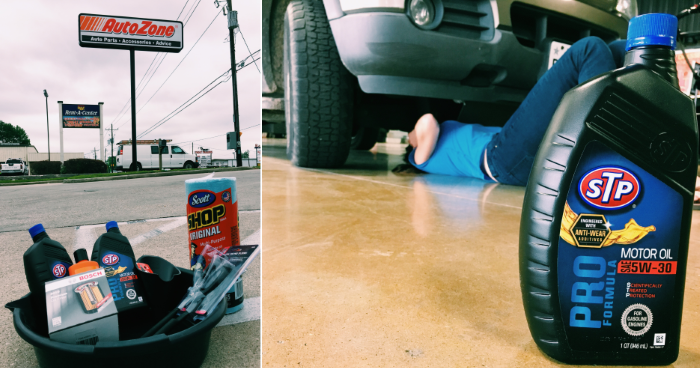
So, let’s get our supplies! With my tax refund in hand, I went to my local AutoZone and stocked up. The employees there were super helpful and also quite supportive of my goal of doing this myself and looked for ways to both save me money and add more value to my DIY car maintence project. They will come out to your car and hook up a device to your car to help you troubleshoot the problem your car is having (sorry, folks in California, this feature is not available there). That is lovely if you happen to have any lights blinking and want to know why (or if you can fix it yourself). If you aren’t sure what you need for your car specifically, they’re able to look up parts and sizes on their computer system so long as you know your car’s year, make, model and engine type (six or eight cylinder.)
Oil
You’ll need as many quarts of oil as your car takes. How many is that? Check your owner’s manuel, it should tell you how much. While you have the manual open, see what oil viscosity it recommends for your car (ex: 10W40, 20W50, etc.)
There are many types of oil too. I found this guide to be especially helpful while choosing oil for my car – but if you are new to car maintence, just ask the AutoZone fella with the red shirt. High mileage oil is great for cars running in the six digits for miles. My mechanic dad always uses full-synthetic on all of his cars (even though the aforementioned guide stated that full-synthetic is only for fancy cars.) He says it’s worth the investment because it does not break down like regular oil, it will only get dirty (like all oil does), it’s great for your engine, and you’ll be set with changing it every six months. So, if any of you are in doubt, spring for the full-synthetic!
Oil filter
Get the highest quality filter, the price difference is minimal and again, it’s worth it. Especially if you are not terribly prompt about changing your oil when you’re supposed to. Also, you’ll need to get a new oil filter each time you change the oil, kind of like a coffee filter (or at least that’s how my brain thinks of it!)
Oil filter wrench
You’ll only need to buy this once, and then you can use it on all subsequent oil changes. If you were doing a bigger car repair project, I would suggest using AutoZone’s free Loan-a-Tool service so you can use the more expensive tools when you need them with just a security deposit!
Socket Wrench
There are three sizes for this. The friendly employees at AutoZone would be happy to help you figure out which size you’ll need to loosen your oil plug.
Oil pan
This needs to be wide and shallow. Again, AutoZone will have the hookup to get you the most highly functional oil pan which will have an easy way to transfer that oil to another container for proper disposal.
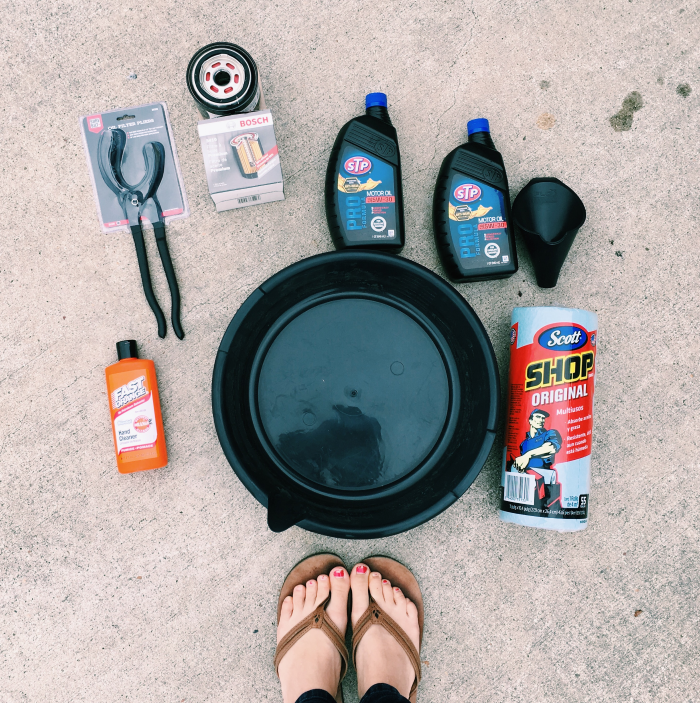
Rags
And plenty of them. This is a messy job, but if you have rags handy, you can minimize the mess. AutoZone hooked me up with a roll of super absorbent SHOP paper towel that worked beautifully.
Plastic sheet/tarp/blanket
For easy cleanup and no oil stains in the garage or on the driveway.
Car Jack and Jack Stands
If you have a car, you’ll likely need to jack it up to get yourself underneath it. If you have an truck or SUV that is higher off the ground (I’ll be changing the oil in my Ford Explorer in the photos,) you may not need to lift the vehicle.
Got all of that? I know it’s a little overwhelming, but with a little background knowledge combined with the helpful advice at AutoZone, it was surprisingly easy to get everything you need in one quick trip!
Alright let’s get to work.
Get the old oil out:
1.) This task is easiest if your oil is already warm, not hot. So after you get home from running an errand, sayyyy getting groceries, bring the groceries in and put them away, and then head back out to change your oil. Read that as roughly 30 minutes after the engine has been running. Or, from cold, drive around the block and then come back to change it.
2.) Lay out your plastic sheet/tarp/blanket and drive over it to ensure easy clean up.
3.) Open up your engine and figure out where your oil goes IN. That’s where you’ll want to be underneath the car to get the old oil out. Look for the oil filter, it will be close to oil pan reservoir.
4.) Safety first! Jack up your car and put jack stands beneath it. Wood or cinder blocks will work as well. NEVER get underneath a car that is only supported by a jack. I’m underneath my Ford Explorer
5.) Place your new filter, oil pan, rags, socket wrench and oil filter wrench into a tray. Then, open up your new oil and smear a little bit onto the new filter’s gasket (it’s the rubber part). Slide it all under the car, and now slide YOURSELF under there!
6.) Using your socket wrench, remove the drain plug slowly, with rags in hand and oil pan in place. The oil will begin to flow.
7.) You can now remove the oil filter and replace it with the new one. Some drain plugs require you to put a new gasket on them, do that when the oil is down to a trickle (if you need to.) Then, put the drain plug back on, tighten it securely with the socket wrench.
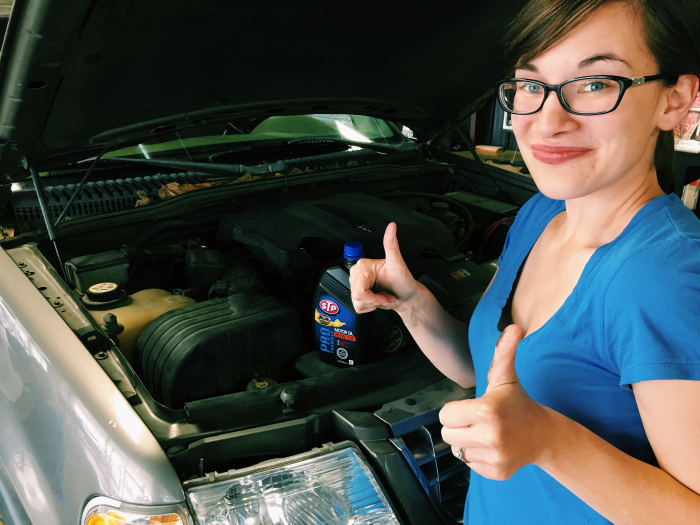
8.) Now, put the new oil filter on, and hand tighten it. (If you use a wrench to tighten the filter, you can damage it, so don’t do that!) Wipe up any drips and GIRLFRIEND, THE HARD PART IS OVER.
>>Now here is the single most important part of this whole thing: do NOT forget to put in the new oil.<<
This seems like a silly thing to remind everyone of, but plenty of people in the world have burned up their engines because they removed the old oil and forgot to put in the new oil. HUGE MISTAKE. Don’t let it happen to you.
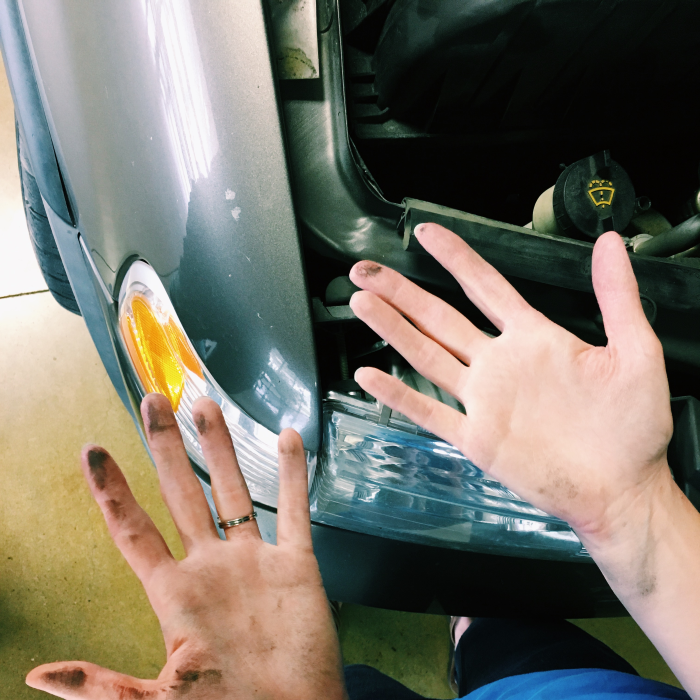
Look, Dad, I got my hands dirty!
9.) So, you’ve done the dirty work under the car, the old oil is out, time to put the new oil in. Using a funnel, pour in the recommended amount of new oil. Start the car, wait until the oil light turns out (the one that looks like a genie lamp, in my humble opinion), turn the car back off, and then check the dip stick. (Clean oil is hard to see on a dip stick, so you have to look closely for that oil shine. There is a low and a full mark–anywhere in between there is fine. ) Add more oil if needed, but do not overfill it or else you’ll have to get BACK under the car and drain the excess oil back out. Not worth it, so keep your oil-filling zeal under wraps, alright?
10.) Pour your old oil into containers that you can seal and recycle. Don’t know where you can do that locally? Ask your local AutoZone store – not all, but most will help you recycle used oil.
11.) Stash those oil-changing supplies away for the next time (3000 miles or 4-6 months), and now bask in your accomplishment. Let a man cook dinner for you tonight, sister, because you EARNED IT.
GIVEAWAY:
Want to change your own oil? AutoZone is gifting a $100 Gift Card to one lucky person who tells us in the comments what car repairs they are putting off. Must be over 18 and live in the United States. Go check out AutoZone on Facebook, Instagram, Twitter or YouTube for more information on how you can save money AND have a happier car – all by doing your own auto repairs. #HoodsUpAmerica.
This post is brought to you by AutoZone; the opinions are all mine.


0